May 29, 2014

WHILE WE WERE SLEEPING.....

As many of you know, "sewing is my passion".  I truly enjoy all aspects of sewing from making custom made clothing to teaching others how to sew.  I teach all levels of sewing to different age ranges.  I had a student who had not sewn for more than 20 years.  She decided to take one of my Beginning Sewing Classes to get back into the sewing.  In the Beginning Sewing class I taught them how to make an easy skirt.  That student is now making purses. I always keep her encouraged, I tell her that I'm proud of her and to keep up the good work.  Well, to my surprise this is what she sent me:

"Thanks! You're a great teacher. Luke 6:40 The student is not above the teacher, but everyone who is fully trained will be like their teacher."

This is her post acknowledging me teaching her how to sew.

Happy Thursday all!
While you were sleeping and I was MIA! lol These are my "Throwback pictures." I decided to get back into sewing and took a class with LaToria Bolling at CSM (College of Southern Maryland). I made the skirt in her class and the bags at home. Have to make time to sew more things like dresses, etc.
Have a blessed day!


This almost bought tears to my eyes.  I love teaching people how to sew and to see them grow in their sewing, it is sooo rewarding. I thank GOD all of the time for the talent HE has blessed with me.

May 17, 2014

Prom Dress #2

Prom Season is underway and I have been very busy making prom dresses.  This is the second dress I made during this year's prom season.  This young lady was very happy with her dress.

Pattern
Dress


She's getting prepared for her prom with having her hair and makeup done.


I always help my prom girls get ready for their prom. She looked beautiful.


She looked beautiful.


Me and the prom girl

Mother and sister with prom girl


Sister with prom girl


Thanks for stopping by my blog.  I have one more prom dress, of course pictures will follow.


May 10, 2014

Prom Dress #1 - A Beautiful and Happy Client

This client was referred to me by a friend.  When I met with this client she knew exactly what she wanted.  The dress she picked out, I had made it twice before.  Although I made it twice before, each time the dress looked different because each client changed something on the dress.  Below is a picture of the pattern I used https://www.google.com/#q=Vogue+Pattern+2931.


She purchased a blue crepe back satin fabric and a light blue lining.


I cut out her pattern pieces according to her body measurements, I had to make adjustments to her pattern pieces by using tissue paper.


 Once the adjustments were made to the pattern pieces, I cut out the pattern pieces onto a flat sheet that I use to make the test garment (muslin).


After the sheet pattern pieces were cut, I made her muslin (test garment)


She came over and tried on her test garment.


An adjustment had to be made in the back.  The writing on the test garment is the same information that's on the paper pattern pieces.  I transfer everything so I will know what the pieces are.


After the adjustments were made, the prom dress was made.  She came over for a fitting for her prom dress.  The proper bra nor the proper undergarments were not worn at this time.


After the proper bra and undergarments were purchased and the dress was hemmed, this is the happy prom girl.  She looked absolutely beautiful.

Happy Client


Prom - May 9, 2014

May 9, 2014

Prom Season - Chronological steps to making a muslin

Prom Season is a very busy time of the year for me.  I truly love making prom dresses and to see the big smile on my clients faces makes it worthwhile.  This year I had 3 prom dresses to make, I decided to take pictures of the chronological order to making the prom dresses, as well as create a folder for each client and the steps involved to completed their dress.  I ALWAYS make a muslin (test garment) first before I cut the client's fashion fabric.

Listed below are the steps I take to making a muslin for my clients:
  1. I meet with the client to discuss what kind of prom dress they want to have made.  Most of my clients bring a picture of the dress they want to have made.  
  2. I take their body measurements, they have to wear a tank top and leggins so I can take accurate body measurements.  
  3. I schedule a date and time for us to go to the fabric store to look through pattern books to purchase the pattern they want.  I discuss any special needs (additions) they may want added to their dress that may not be on a pattern.  If we cannot find the pattern that's exactly like the dress they want, I know how to take two patterns to make their dress (i.e., the top from one pattern and the bottom from another pattern).
  4. I go to a Thrift Store to purchase "flat sheets" that I use as a muslin.  Normally I can purchase 6 sheets for about $12.00.
  5. I machine wash the sheets in hot bleach water to make sure they are clean before I use them.
  6. I cut out the pattern size according the client's body measurements.  I press the pattern pieces with a "dry iron" (i.e., no water in the iron).
  7. I lay the pattern pieces out on the flat sheet to make the test garment.  
  8. I cut out the pattern pieces and I label each sheet piece according to the pattern pieces so I will know what each piece is and I transfer ALL MARKINGS.
  9. I make the shell of the dress (no lining) out the flat sheet by using BASTING stitches (temporary stitching).
  10. I call the client over for their "first" fitting and I explain to the client that the sheet dress is a "test" garment (because they may not understand the term "muslin").  They have to wear the undergarments they are going to wear with the dress.  This is very important because the final fit will not be the same if they are not wearing the same undergarments they will wear on prom night. 
  11. I have the client to try on the test garment and I make the alternations that are needed to get the perfect fit.  I do this by first having the client to try the test garment on just as they will wear it, then I have them put the dress on inside out so I can use safety pins to pin out the extra fabric or cut open areas where the test garment may be too tight.
  12. After all of the pinning have been done, I have the client to put the dress back on the way it will normally be worn so they can see the actual fit of the test garment.
  13. I then turn the test garment inside out, I use a black Sharpie Pen to mark where the pins are, then I use another color Sharpie Pen (for instance green) and I measure 5/8" from the black mark and draw another line with the green Sharpie (this is my NEW seam allowance).
  14. I remove the pins and take the test garment apart (remember I used basting stitches) so it is easy to take it apart.
  15. I cut along the green line where the alterations/adjustments were made.
  16. At this point I NO LONGER use the paper pattern pieces, I use the sheet pattern pieces.  I put the pattern pieces back in the pattern envelope.
  17. I lay out the sheet pattern pieces according to the layout instructions on the fashion fabric.  I cut out everything and I make all the markings.
  18. I then start to make the prom dress out of the client's fashion fabric.
  19. Once the prom dress is made, I call the client over for another fitting with their undergarments and shoes.  The length of the dress is determined at this fitting.
  20. After the dress is hemmed and pressed, I call the client over to try the dress on for the LAST time and they take the dress home with them.
 I know this may sound like a lot but it is worth it because I do not want to cut into the fashion fabric until all of the alterations have been done on the test garment. This process guarantees the client will have the perfect fit for their prom dress.  I have been using this process for a few years since it was introduced to me by one of my sewing girlfriends.  Let me tell you, I did not adopt this method easily, I pouted about having to do what I thought was a long process.  Once I did it a few times, it became second nature to me and now I do not make a prom dress without making a muslin or test garment FIRST.  I even make a muslin for some things that I make for myself.

I wanted to share with you my method of making prom dresses.

April 2, 2014

DIY Skirt - Simplicity 1465 View D

This is the young lady from Holland that I was teaching how to sew. I taught her how to read a pattern, how to take body measurements and I took her to the fabric store to teach her how to buy fabric for the particular garment she wanted to make. She did a fantastic job on her skirt.


March 27, 2014

Chocolate Avocado Mousse

Someone posted a Vegan "Chocolate Avocado Mousse" recipe on Facebook a few days ago. Well, I tried it and it's delicious. You don't taste the avocados, it really taste like chocolate. I'm not a vegan but I LOVE avocados.  Once the bowls chill, I will top them with sliced strawberries. This will be my healthy dessert, I will definitely try it again.

 
Some people have asked me to post the recipe for the chocolate avocado mousse recipe.
 
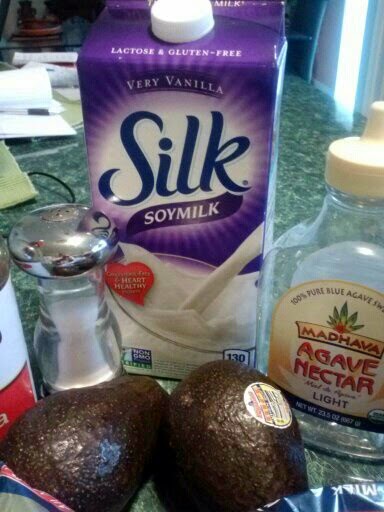
 Below is the recipe, I used 3 avocados instead of 4 because I wanted to have some left for breakfast for the next few days. Although I used 3 avocados it's still a nice texture, I'm sure it would be a little thicker if I had used 4. I have a nut allergy, so I used Ghiradelli chocolate chips because it's all natural (I can't use Hershey, but you can) and I used Vanilla soy milk instead of Almond Milk.
 
INGREDIENTS
⦁ 1/2 cup semisweet chocolate chips, such as Ghirardelli
⦁ 4 very ripe (8 ounce) avocados, peeled and pitted
⦁ 1/2 cup agave
⦁ 1/2 cup unsweetened cocoa powder
⦁ 1/3 cup almond milk
⦁ 1 tablespoon pure vanilla extract

DIRECTIONS
Place the chocolate chips in a small bowl. Place over a small saucepan of barely simmering water. Stir until the chocolate is melted and smooth, about 3 minutes. Set aside to cool slightly.
Place the melted chocolate, avocados, agave, cocoa powder, almond milk, vanilla and salt in a food processor. Blend until smooth and creamy, scraping the sides of the bowl as needed. Spoon into glasses and refrigerate for at least 3 hours (can be prepared 1 day in advance). Garnish with fresh raspberries and serve.


March 20, 2014

My Breakfast After My Workout

When I work out I try to have a healthy meal afterwards, if I workout in the mornings, I try to eat a healthy breakfast, if I workout in the evenings, I try to eat a healthy dinner so all of my hard work doesn't go to waste.  One morning I was talking to a girlfriend in the gym, we were talking about eating egg whites for breakfast and she told me to try adding spinach to my egg whites.  She also suggested that I try eating a half of an avocado as well.  I tried both and let me tell you, it is "delicious", now this is something I eat several times a week.  I periodically switch up my meals so I won't be eating the same thing and get bored with it.  This was my breakfast this morning after my workout, egg whites with spinach, 1/2 of an avocado sprinkled with pepper, bacon, toasted wheat sandwich thins and orange juice.


March 17, 2014

PASSING ON MY GOD GIVEN TALENT

A few days ago I posted about my sewing students completing their projects and how much one student had accomplished and at the end of that post I wrote "I LOVE THE TALENT GOD HAS BLESSED ME WITH AND I LOVE PASSING IT ON."

When I attended Church on Sunday, March 16th, the topic was "Life Is A Gift, Your Life Is An Investment". Our Pastor talked about how we all have GOD given gifts and what have we done to make it better? He said our ""gift" is an investment. GOD has gifted you to make money, that's your blessing to the body of Christ. Whatever your gift is, GOD is expecting you to come back with more. You should invest in what you've been given." I said "WOW!!! I just posted yesterday how GOD gave me a talent and I was passing it on."

If you have a talent, please grow in your talent and pass it on to others. It's a wonderful feeling to see someone else grow in a talent where you have planted a seed for them.

March 15, 2014

PASSING ON MY SEWING EXPEREINCE AND SKILLS TO OTHERS

This is a picture of one of my students who took my Beginning Sewing Class, she is wearing her completed skirt.  I'm so proud of her.


This young lady here did not know how to read a pattern before taking my class. At the beginning of the first class she told me she took private lessons from someone before. At the end of that 3 hour class she told me she learned more from me than she did during her private lessons. She was the first to complete her skirt. Today was the last day of our 6 week session (she's going to sign up for Part II), she came to class with a pair of shorts she made, a picture of a pair of long pants she made and she was cutting out a dress to make out of linen fabric. It touched my heart sooo much today to see how much she had accomplished during the 6 week class session and to see how much she has grown and will continue to grow in her sewing. She is going to Myrtle Beach this week to visit her daughters and she is going to take her sewing machine with her so she can make them some dresses. I LOVE THE TALENT GOD HAS BLESSED ME WITH AND I LOVE PASSING IT ON. I LOVE WHAT I DO....


March 6, 2014

Teaching Our Youth How To Sew

I'm teaching this 11 year old young lady how to sew at Suitland Community Center in Suitland, Maryland.  She completed her dress tonight.  She loves to wind the bobbin on the machine.  Look at her hand placement on the fabric, she loves sewing.  She is a joy to teach, I look forward to seeing her twice a week. I hope she continues with sewing after our sessions are over.

She loves to wind the bobbin


Look at her hand placement


 She completed her dress